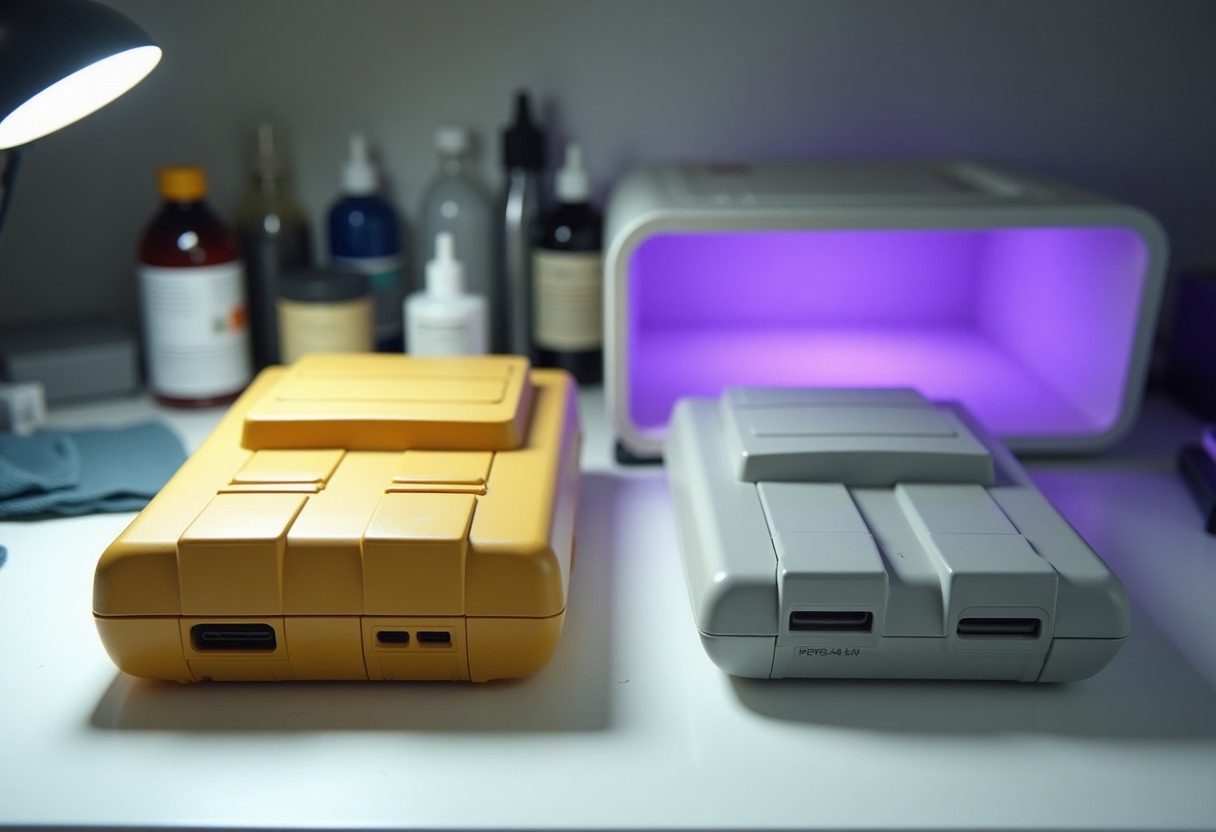
That pristine SNES you bought fifteen years ago now looks like someone dunked it in mustard. The yellowing that plagues ABS plastic on retro consoles isn't just cosmetic damage—it actively destroys collector value and reveals deeper chemical degradation happening within the plastic itself.
Why Retro Console Plastic Yellows and What You Can Do
ABS plastic contains flame retardant chemicals that break down when exposed to UV light, heat, and oxygen over decades. The yellowing occurs when brominated flame retardants migrate to the surface and oxidize, creating the characteristic yellow-brown discoloration seen on Super Nintendo systems, classic computers, and other electronics from the 1980s and 1990s.
This chemical breakdown isn't uniform—which explains why your SNES might have a perfectly white cartridge door next to a butter-yellow main shell. Different plastic batches, manufacturing dates, and storage conditions all affect the rate of degradation. Understanding this chemistry matters because it determines which restoration methods actually work versus those that provide temporary cosmetic fixes.
Professional console restorers have developed reliable techniques to reverse this damage. The most effective approach combines hydrogen peroxide chemistry with controlled UV exposure—a process commonly called "retrobrighting" after the original RetroBrite gel formula.
Chemical Restoration Methods That Actually Work
The core principle behind successful plastic restoration involves using hydrogen peroxide to chemically reverse the oxidation process. When exposed to UV light, hydrogen peroxide breaks down into hydroxyl radicals that can re-bond with the degraded brominated compounds, effectively undoing years of yellowing.
Three proven methods deliver consistent results: cream-based treatments, gel applications, and liquid immersion. Cream treatments using → Shop hydrogen peroxide cream on Amazon offer the most controlled application for console shells. The thick consistency prevents dripping and allows for even coverage on vertical surfaces.
Gel-based retrobriting provides similar benefits with longer working times. Commercial → Shop retrobrite gel on Amazon formulations include stabilizers that prevent the hydrogen peroxide from breaking down too quickly under UV exposure.
Liquid immersion works best for small parts like controller pieces or cartridge shells. Mix 40-volume hydrogen peroxide with a small amount of liquid laundry detergent containing optical brighteners. The detergent helps the solution cling to plastic surfaces and provides additional bleaching agents.
UV exposure drives the chemical reaction. Natural sunlight works but provides inconsistent results due to cloud cover and seasonal variations. → Shop UV blacklight bulbs on Amazon designed for reptile terrariums deliver consistent 280-315nm wavelengths needed for optimal hydrogen peroxide activation.
Temperature control prevents plastic warping. Keep treated parts between 70-85°F during the process. Higher temperatures accelerate the reaction but risk melting thin plastic sections or causing stress fractures in older, brittle material.
Comparing Restoration Techniques: Effectiveness and Risk
| Method | Effectiveness | Time Required | Risk Level | Best For | |--------|---------------|---------------|------------|----------| | Hydrogen Peroxide Cream + UV | 90-95% yellowing removal | 4-8 hours | Low | Console shells, large flat surfaces | | Retrobrite Gel Treatment | 85-90% yellowing removal | 6-12 hours | Low-Medium | Controllers, irregular shapes | | Liquid Immersion Bath | 95-99% yellowing removal | 2-6 hours | Medium | Small parts, cartridge shells | | Salon Care 40 + Heat | 80-85% yellowing removal | 1-3 hours | High | Emergency restoration, test pieces |
Professional restorers consistently achieve the best results with hydrogen peroxide cream applications. The controlled consistency prevents over-exposure while delivering even coverage across large surfaces. This method works exceptionally well on console shells from the Best Retro Consoles 2026 era when ABS plastic formulations were most susceptible to brominated flame retardant degradation.
Safety equipment remains non-negotiable. Hydrogen peroxide concentrations above 12% can cause severe chemical burns. Nitrile gloves, safety glasses, and adequate ventilation prevent accidents during treatment. Never mix hydrogen peroxide with other chemicals or cleaners.
Essential Tools and Materials for Professional Results
Quality restoration requires specific tools beyond basic cleaning supplies. → Shop console opening tools on Amazon designed for vintage systems prevent damage to fragile plastic tabs and hidden screws. The Nintendo Game Bit set remains essential for accessing SNES, N64, and Game Boy hardware.
Post-treatment polishing removes fine scratches and restores original surface texture. → Shop plastic polishing compound on Amazon formulated for automotive headlight restoration works perfectly on console plastics. Avoid abrasive compounds that can leave permanent micro-scratches.
Documentation matters for valuable systems. Photograph console serial numbers, manufacturing stamps, and any unique markings before disassembly. This information proves authenticity and maintains provenance records crucial for high-value items covered in our Complete Cib Retro Game Condition Grading Guide.
Temperature monitoring prevents heat damage during UV treatment. Digital thermometers with probe attachments track surface temperatures without interrupting the restoration process. Suspend treated parts on wire racks to ensure even air circulation and prevent hot spots that can warp thin plastic sections.
Advanced Techniques Most Guides Miss
Staged restoration delivers superior results on heavily yellowed consoles. Instead of attempting complete restoration in a single session, apply multiple shorter treatments over several days. This approach prevents over-processing while allowing you to monitor progress and adjust technique based on how the specific plastic responds.
Masking tape creates sharp restoration lines when treating consoles with mixed plastic types. Some manufacturers used different ABS formulations for different shell sections, leading to uneven yellowing patterns. Precise masking ensures uniform final appearance across the entire console.
Pre-treatment cleaning affects restoration success more than most collectors realize. Accumulated dirt, oils, and residue prevent hydrogen peroxide from penetrating plastic surfaces evenly. Use isopropyl alcohol and cotton swabs to clean intricate areas like ventilation grilles and button recesses before applying restoration treatments.
Testing inconspicuous areas reveals how specific plastic batches respond to treatment. Apply a small amount of hydrogen peroxide to hidden surfaces like battery compartment interiors or expansion port covers. Monitor results for 30 minutes before proceeding with full restoration. Different manufacturing periods and plastic suppliers can produce dramatically different responses to identical treatments.
Heat guns provide targeted warming for stubborn yellowing but require extreme caution. Hold the gun at least 12 inches away and keep it moving constantly to prevent localized overheating. This technique works particularly well on thick plastic sections like power button surrounds that resist standard UV treatment.
FAQ
How long does retro console plastic restoration last before yellowing returns? Properly restored plastic typically maintains its appearance for 5-10 years under normal storage conditions. The restoration process doesn't prevent future yellowing since the underlying chemistry remains unchanged, but it significantly slows the degradation rate. Consoles stored in dark, cool environments stay restored longer than those exposed to sunlight or heat sources. UV-protective display cases extend restoration longevity by blocking the wavelengths that trigger brominated flame retardant breakdown.
Can yellowed plastic restoration damage the console's internal components? Hydrogen peroxide treatments pose minimal risk to internal electronics when proper disassembly procedures are followed. Remove all circuit boards, power supplies, and metal components before treatment. The main risk comes from hydrogen peroxide seeping into cartridge connectors or power jack assemblies if shells aren't properly cleaned and dried before reassembly. Always wait 24 hours after treatment completion before reinstalling internal components to ensure complete chemical neutralization.
Which retro consoles respond best to plastic restoration techniques? Systems manufactured between 1985-1995 show the most dramatic improvement from restoration. The SNES, original Game Boy, and Sega Genesis respond exceptionally well due to their specific ABS plastic formulations. Later consoles like the Nintendo 64 and original PlayStation use different plastic compounds that yellow less severely but also respond less dramatically to hydrogen peroxide treatment. Handheld systems generally restore better than home consoles because their plastic is typically thinner and allows better chemical penetration.
Should I restore yellowed plastic on rare or valuable consoles? Restoration can actually increase value on common consoles by improving cosmetic condition, but proceed cautiously with rare variants. Check current market prices and condition premiums before starting—some collectors prefer original patina on extremely rare systems. Document the restoration process thoroughly with before/after photos for future buyers. Consider consulting our Most Valuable N64 Games To Collect and Most Valuable Snes Games Ever guides to understand how condition affects specific system values.
What's the difference between hydrogen peroxide concentrations and which should I use? 40-volume (12%) hydrogen peroxide provides the best balance of effectiveness and safety for console restoration. 20-volume (6%) works but requires longer treatment times and may not fully restore heavily yellowed plastic. Concentrations above 40-volume (12%) increase fire and chemical burn risks without proportional improvement in results. Salon supply stores typically carry 40-volume cream developer formulated for hair bleaching that works perfectly for plastic restoration when combined with proper UV exposure.
Professional restoration transforms yellowed console plastic from cosmetic liability into pristine collectible condition, but success depends entirely on understanding the chemistry and respecting the process.
Some links on this page are affiliate links. We may earn a small commission if you purchase through them, at no extra cost to you.
As an Amazon Associate we earn from qualifying purchases. This article contains affiliate links; if you buy through them we may earn a small commission at no additional cost to you.