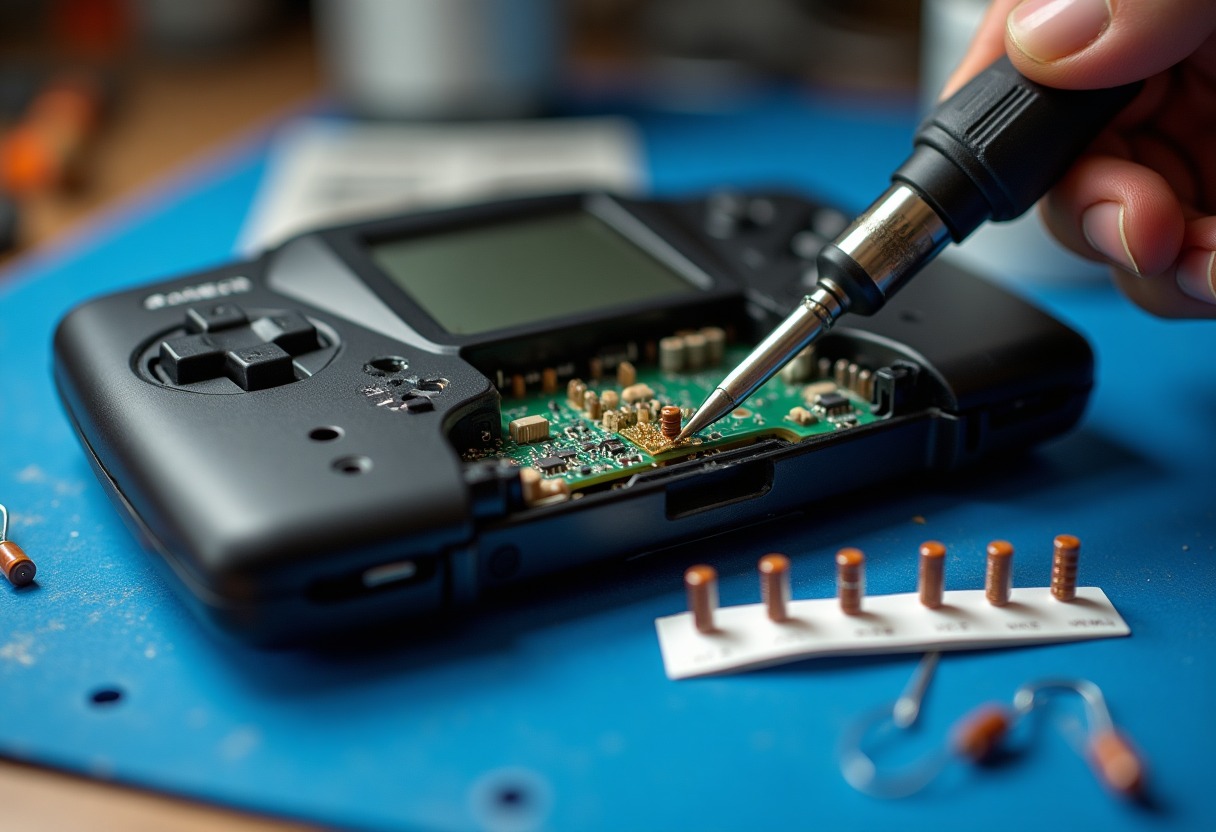
Every Game Gear you find today has failing capacitors — not might have, has. The electrolytic caps Sega used in 1990 weren't designed to last 35 years, and now they're leaking, bulging, and destroying traces on the mainboard. No sound, washed-out screens, random shutoffs — these aren't mysteries, they're predictable failures with documented fixes that can triple a unit's market value when done correctly.
Why Game Gear Capacitor Replacement Is Non-Negotiable
The Game Gear used 13 surface-mount electrolytic capacitors across its main board and audio board — six on the mainboard, seven on the audio board. Every single one will eventually fail. Electrolytic capacitors dry out over time, losing capacitance and increasing ESR (equivalent series resistance). When ESR climbs above acceptable ranges, voltage regulation fails, causing audio distortion, screen dimming, and power instability.
Capacitor failure follows a pattern: audio issues appear first (muffled sound, static, complete silence), then screen problems (dim backlight, washed-out colors, vertical lines), followed by power failures (won't turn on, immediate shutoff, battery drain). Waiting doesn't help — leaked electrolyte corrodes PCB traces, turning a $40 recap job into a $200+ trace reconstruction nightmare.
A properly recapped Game Gear sells for $120-180 on the collector market versus $40-60 for "as-is" units. That's not speculation — check completed eBay listings for units advertised as "fully recapped and tested." The restoration adds tangible value because buyers know they're getting years of reliable use, similar to how properly maintained consoles command premium prices across the board as detailed in our Complete CIB Retro Game Condition Grading Guide.
Game Gear Common Problems: Diagnosis Before Disassembly
Before ordering parts, diagnose exactly what's failing. Running blind wastes time and risks damaging functional components.
No Sound or Distorted Audio: This is capacitor C42, C43, C44, C45, C46, or C47 on the audio board. Sometimes all six need replacement. Test by connecting headphones — if headphone audio works fine but speaker audio is dead, the problem is isolated to the speaker circuit caps.
Dim or Washed-Out Screen: Failing mainboard capacitors C51, C52, or C60 affect voltage regulation to the LCD backlight and color circuits. The screen will still display images but looks faded, yellow-tinted, or requires extreme viewing angles.
Won't Power On or Immediate Shutoff: Check C7, C8, C9, and C10 on the mainboard first. These regulate power delivery from the battery compartment. Visual inspection often reveals bulging caps or white crusty residue (leaked electrolyte).
Distorted/Buzzing Audio at High Volume: This specifically points to failing C42 and C43 on the audio board. These filter the audio amplifier output — when they degrade, you get distortion under load.
Tune Drift (Interfering Lines on Screen): Tuning capacitors C3 and C4 on the mainboard affect video signal stability. You'll see diagonal interference lines that shift when you move the unit.
Game Gear Capacitor Replacement: Tools and Parts List
You need the right equipment. Cheap soldering irons and generic caps cause more problems than they solve.
Required Tools:
- Temperature-controlled soldering station (300-350°C for SMD work) — → Shop soldering iron temperature controlled on Amazon
- Solder wick or desoldering braid for removing old caps — → Shop solder wick desoldering braid on Amazon
- Flux pen for SMD work — → Shop flux pen electronics on Amazon
- Tri-wing screwdriver for Game Gear shell removal
- Fine-tip tweezers
- Isopropyl alcohol (90%+) and cotton swabs
- Magnifying lamp or jeweler's loupe
Capacitor Specifications: You need exact-match or better ratings. Don't substitute random caps from your junk drawer.
| Location | Original Spec | Recommended Replacement | Purpose | |----------|--------------|------------------------|---------| | Mainboard (C51, C52, C60) | 100µF 6.3V | 100µF 10V low-ESR | LCD voltage regulation | | Audio Board (C42-C47) | 47µF 16V | 47µF 25V low-ESR | Audio amplifier filtering | | Power Section (C7-C10) | 100µF 16V | 100µF 25V low-ESR | Power supply filtering | | Tuning Circuit (C3, C4) | 10µF 16V | 10µF 25V low-ESR | Video signal stability |
Buy a complete → Shop Game Gear capacitors on Amazon or source individual caps from Console5 or Retro Game Repair Shop — these vendors pre-sort kits by console revision. Generic → Shop SMD capacitor kit on Amazon works if you verify specs carefully.
Step-by-Step Capacitor Replacement Process
Disassembly: Remove six tri-wing screws from the back shell. Lift the back half carefully — the speaker wire connects the two halves. Don't yank it. Remove the metal RF shield (four screws) to access the mainboard.
Capacitor Removal: Apply flux to the capacitor pads. Heat both solder joints simultaneously with your iron tip bridging both pads — this takes practice. Once solder flows on both sides, gently lift the cap with tweezers. If it resists, add more flux and heat. Forcing it tears pads.
Alternatively, use solder wick: apply flux to the cap, press wick against the solder joint, heat through the wick. The wick absorbs molten solder. Repeat on both pads until the cap lifts free.
Pad Cleaning: Remove all old solder with wick. Clean pads thoroughly with isopropyl alcohol. Look for corrosion — green or white residue means electrolyte leaked. Scrape it away gently with a fiberglass pen or fine sandpaper. Check continuity with a multimeter; lost traces need jumper wire repairs.
New Capacitor Installation: Match polarity markings. Electrolytic capacitors have a negative stripe — this must align with the negative pad (usually marked with a minus sign or shaded region on the PCB silkscreen). Apply fresh flux to clean pads. Position the new cap, tack one side with solder, verify alignment, then solder the other side fully. Use minimal solder — too much creates bridges.
Testing Between Sections: After replacing mainboard caps, reassemble and test before moving to the audio board. This isolates problems. Power on, check for video and sound. If sound is still bad, proceed to audio board recap. If video is still dim, recheck mainboard solder joints and polarity.
Audio Board Recap: The audio board sits under the main board. Remove it by unscrewing two Phillips screws and disconnecting the ribbon cable. Replace all seven capacitors following the same technique. The audio board is more forgiving since traces are larger.
Screen Repair and Backlight Replacement
Capacitor replacement fixes most screen issues, but physical screen damage requires different approaches.
Vertical Line Repair: Vertical lines on the LCD come from failed ribbon cable connections at the screen edge, not capacitors. These connections use thermally-bonded conductive adhesive that fails over time. Repair requires a specialized tip (chisel or flat blade) heated to 200-220°C, pressed firmly against the ribbon cable ends for 5-10 seconds. This reflows the adhesive. Success rate is maybe 60% — some screens are too far gone.
Backlight Replacement: Original Game Gear backlights are CCFL tubes (cold cathode fluorescent lamps) with terrible efficiency and lifespan. Modern LED backlight kits replace these with energy-efficient white LEDs. Installation requires removing the LCD assembly, desoldering the CCFL inverter circuit, and wiring in the LED kit. Brightness improves dramatically and battery life nearly doubles.
Backlight modding pairs well with bivert chip installation (reverses LCD polarity for better contrast) and glass lens replacement (eliminates the plastic lens that scratches and yellows). A fully modded Game Gear with modern LED backlight, glass lens, and fresh capacitors represents the pinnacle of Best Retro Gaming Handhelds restoration.
Value Impact and Collector Market Reality
Numbers matter to collectors. A Game Gear "as-is" averages $45-65 on eBay. The same unit fully recapped with documented work sells for $130-180. Add a modern LCD backlight mod and you're at $200-250. That's not inflated pricing — search completed listings filtered by "recapped."
Documentation increases value. Include photos of the work, list specific capacitors used (brand and ratings), note any trace repairs, and provide a test report. Buyers pay more when they see professional work rather than "trust me, I fixed it." This mirrors the authentication and condition standards we discuss in our Game Boy Advance Cartridge Authentication Guide — provenance and transparency command premiums.
The restoration learning curve is steep but worthwhile. Your first recap takes 4-6 hours. Your fifth takes 90 minutes. Skills transfer directly to other vintage handhelds — the Game Boy Color Battery Replacement Guide uses many of the same techniques, and advanced collectors tackle PS2 Disc Read Error Laser Replacement Guide level complexity after mastering SMD soldering on Game Gear boards.
Advanced Troubleshooting: Beyond Standard Capacitor Replacement
Trace Reconstruction: Leaked electrolyte eats copper traces. If a recap doesn't restore function, check continuity between component pads and their destination points on the PCB. Use the Game Gear schematic (available through Sega Retro community archives) to identify proper connections. Bridge broken traces with 30AWG kynar wire soldered directly to pads.
Voltage Regulation Testing: After recap, measure voltage at test points with a multimeter. The 5V rail should measure 4.9-5.1V under load. The LCD backlight rail should hit spec (varies by model revision — check schematics). Out-of-spec voltages point to bad solder joints or incorrect capacitor values.
Audio Circuit Isolation: If sound issues persist after full audio board recap, the problem might be the volume wheel (potentiometer) or speaker itself. Test by probing audio output at C47 with an oscilloscope or connecting external speakers directly to that point. If audio is clean there, replace the volume wheel or speaker.
Power Switch Cleaning: Intermittent power or units that won't stay on sometimes trace to dirty power switch contacts, not capacitors. Disassemble the power switch (it's accessible without full teardown), spray with DeoxIT contact cleaner, work the switch 50-100 times, then test. This fix takes three minutes and saves hours of diagnostic work.
FAQ
How long does Game Gear capacitor replacement take for a beginner? Expect 4-6 hours for your first complete recap if you're new to SMD soldering. This includes disassembly, both boards, cleaning, reassembly, and testing. Experienced restorers complete the job in 90 minutes. Don't rush — a single torn pad adds hours of trace repair work.
Can I use through-hole capacitors instead of SMD replacements? Yes, but it's messy and reduces resale value. You'd solder through-hole caps to the SMD pads using their leads bent flat, then secure them with hot glue or epoxy. Collectors prefer authentic-looking SMD work. Only use through-hole caps if you absolutely can't source proper SMD replacements.
Will recapping fix a Game Gear that won't power on at all? Usually, yes — if the issue is capacitor-related. Check for leaked electrolyte corrosion first; if traces are intact, recapping restores power in about 85% of dead units. The remaining 15% have failed voltage regulators, broken power switches, or damaged mainboard components requiring component-level diagnosis.
What's the difference between standard and low-ESR capacitors for Game Gear? Low-ESR (equivalent series resistance) capacitors handle high-frequency signals better and last longer in switching circuits like the Game Gear's power supply. Standard electrolytics work but degrade faster. Spend the extra $2-3 per kit for low-ESR caps — the difference is measurable in audio clarity and power stability.
Should I recap a Game Gear before selling or sell it as-is? Depends on your skill level and time value. A properly recapped Game Gear sells for $80-120 more than as-is, but takes 2-4 hours of skilled labor. If you can do the work competently with documented results, the value increase justifies effort. If you'd hire someone else or produce questionable work, sell as-is and let the buyer choose their restorer.
Closing Paragraph
Game Gear capacitor replacement transforms broken handhelds into reliable players — the work isn't optional anymore, it's baseline maintenance for units pushing four decades old, and the difference between a $50 parts donor and a $180 restored collector piece comes down to four hours with a soldering iron and the confidence to do it right.
Some links on this page are affiliate links. We may earn a small commission if you purchase through them, at no extra cost to you.
As an Amazon Associate we earn from qualifying purchases. This article contains affiliate links; if you buy through them we may earn a small commission at no additional cost to you.